- Go to Layout > Edit HTML, find header css code. For example
#header-wrapper {
background:#FFFFFF;
width:920px;
height:90px;
margin:0 auto 0px;
}
It means, header size on your template is width 920 pixel and height 90 pixel. Now you have known your header size.
- Create your own header, size width 920 pixel and height 90 pixel using image editing software such as Photoshop, Corel Draw, Inkscape
- Go to Layout > Page Element
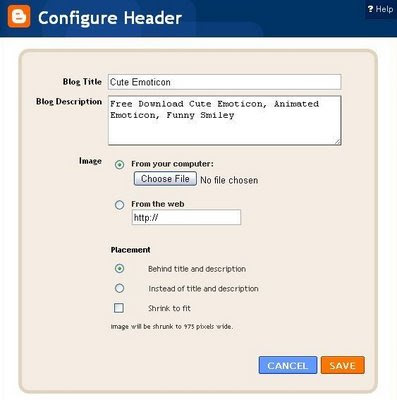
- Click Edit on Header Section and this form will appear

- Click Choose File from your computer, pick your header image that you've created before
- After upload finish, image header will appear
- There are two placement option. If you want header title and description text keep appear, choose Behind title and Description , if you want image header wrap header title, choose Instead of title and description
- Save

0 comments: on "How to Change Header Through Page Element?"
Post a Comment